How do I use the 'Projects' feature to automatically label expenses?
Save time when managing and reconciling expenses by creating 'Projects' - your custom project label (as well as the associated accounting code) will be automatically assigned to any expenses incurred within a specified time period, for one or more selected cards. You can then run and export comprehensive statements for your project.
This is ideal for automatically allocating expenses to a particular Yacht, Charter, music tour, or production.
Step 1
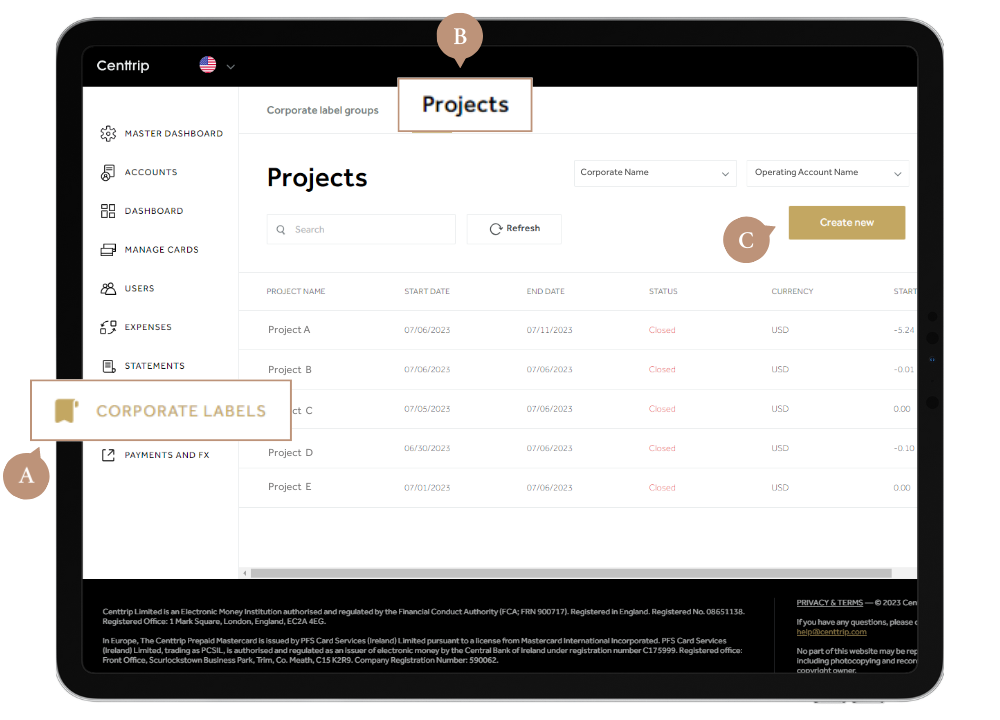
Visit your CORPORATE LABELS dashboard and switch to the Projects tab. Then click Create new.
Step 2
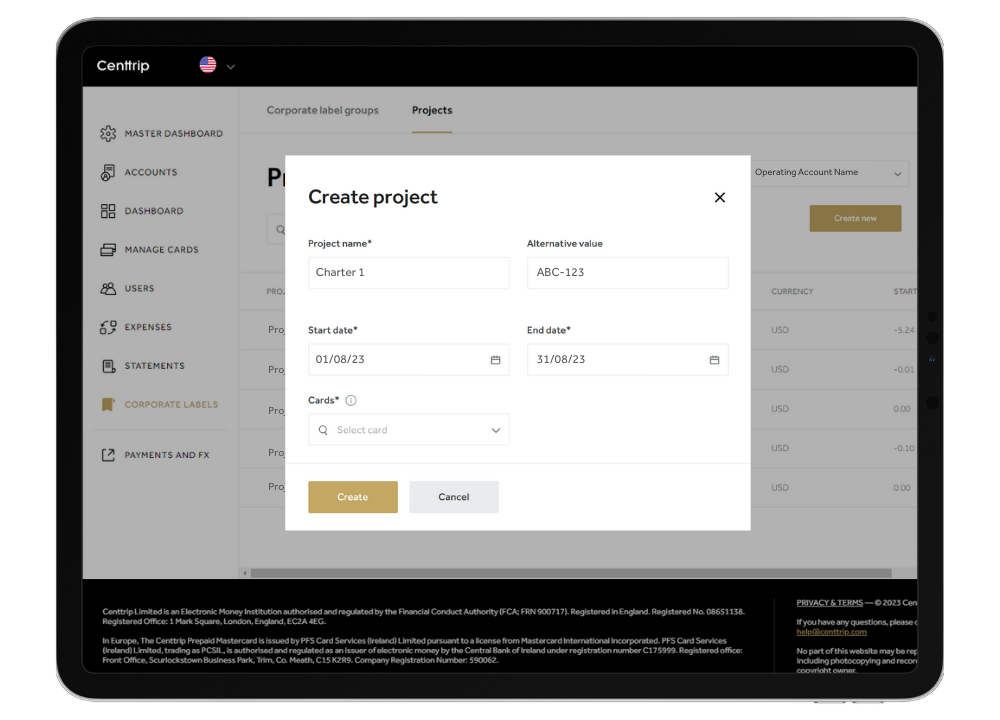
Enter the project name, an alternative value (such as an accounting code) and the duration of your project. Then select which Centtrip cards should be associated. For example, you could enter the name of a yacht as the project, with the charter start and end dates, and only add the cards for that specific charter crew.
Step 3
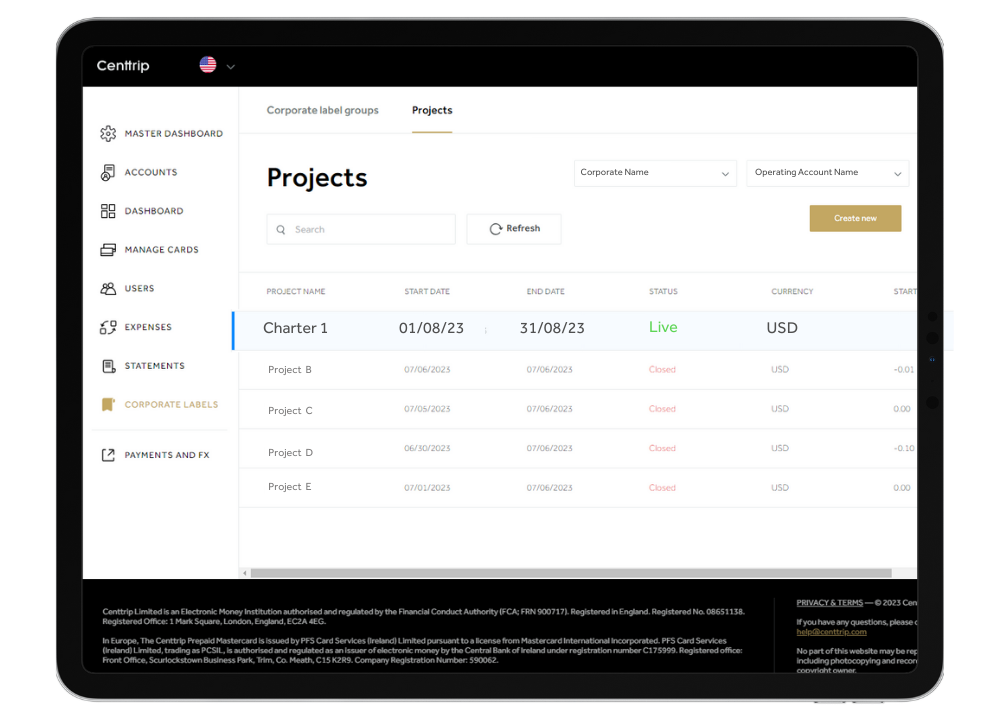
Once set up, the project label will be automatically attached to any expenses incurred during your specified period, for your selected cards. Your project will show as Pending, Live or Closed, dependent on the project dates you entered. This means you can set up projects ahead of time.
Step 4
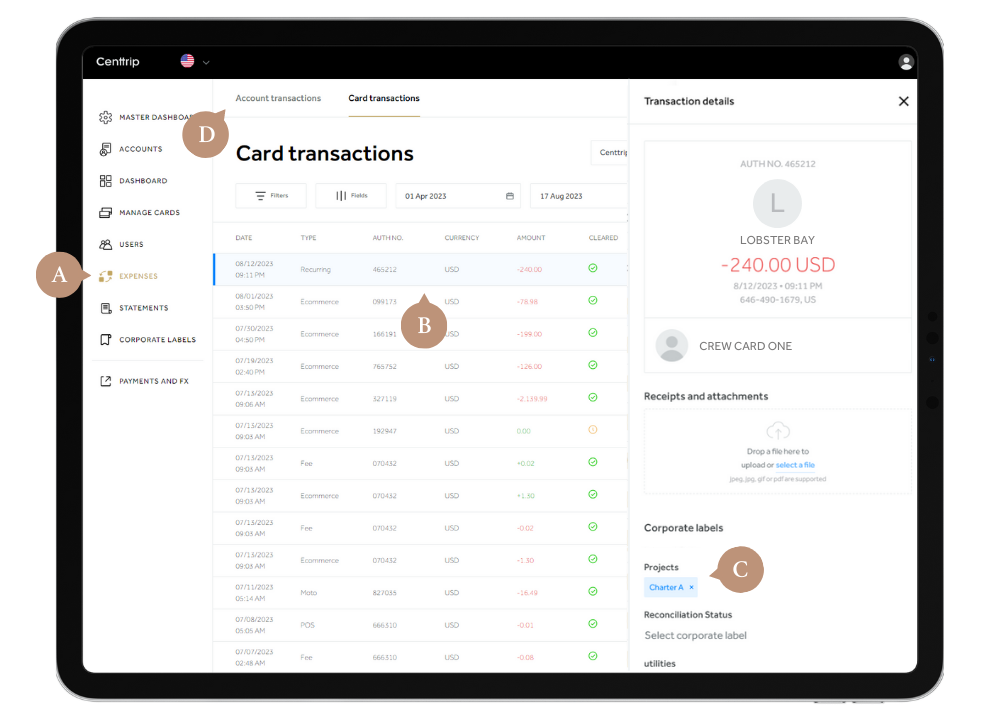
If required, you can also add or remove project labels manually. Visit EXPENSES and click on a transaction. Then use the dropdown to add your project under Corporate labels. Click the cross to remove it anytime. Switch to the Account transactions tab to add project labels in the same way.
Step 5
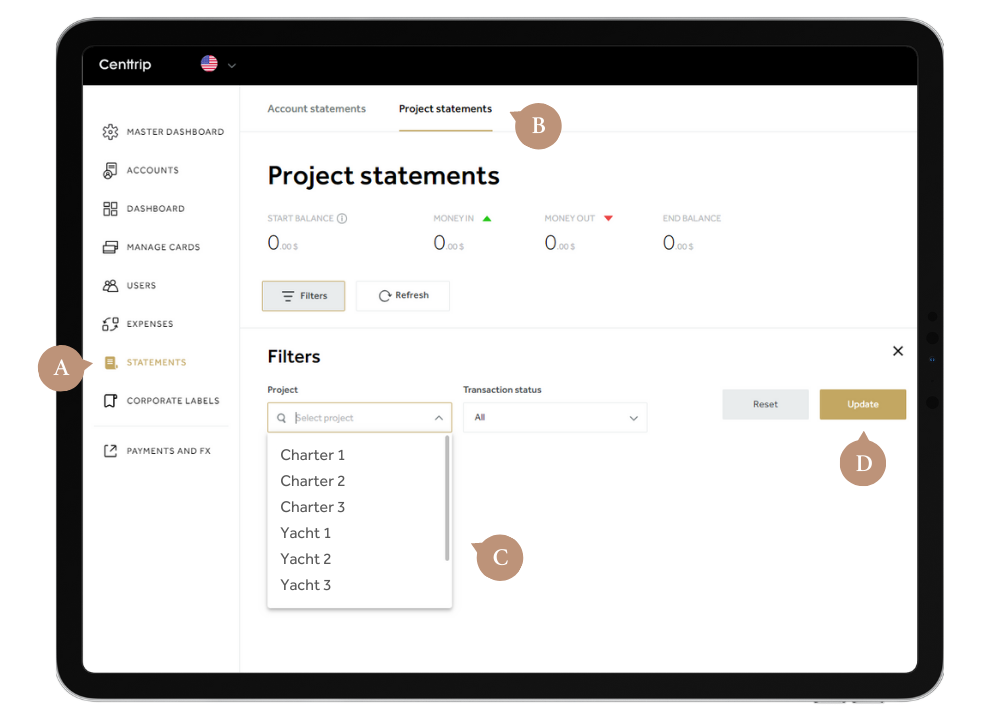
To view statements and export reports for a particular project, visit STATEMENTS and switch to the Projects tab. Then use the filter to select a project and hit Update to view all associated expenses.
Step 6
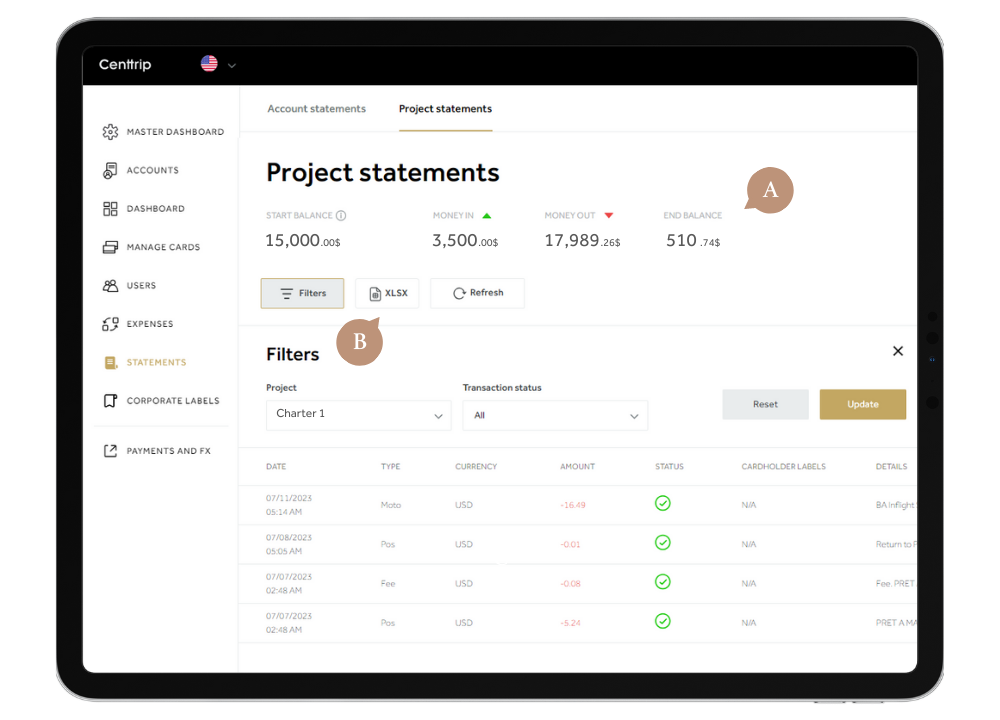
You can view the opening and closing balances for your project, along with the money in and out at the top. Click XLSX to export - edit, analyse, share with clients, or integrate into your existing accounting systems.
